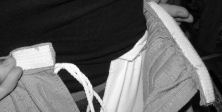
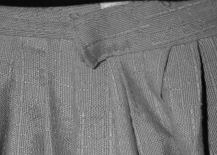
To make the front of the skirt slant, measure in 6" at the hem and mark it. Using a straight edge, draw a line from the mark on the hem to the corner of the waist. If it is easier, you can make a pattern for this using paper or use the cut off end of a previous skirt as is shown in the picture. The pattern should be placed along the edge of the fabric with the wide end at the hem and narrow end at the waist. Cut the fabric along this line. Repeat this on the second piece of material, being careful that that the top and bottom of the design match if the material has a
directional pattern. Zigzag stitch the raw ends on both pieces of fabric to prevent raveling.
Fold and iron ½ inch of fabric along the angled cut. Fold and iron a second time. Stitch this edge. Do this for the other panel as well.
Place the two panels together, right side to right side. On the edge that does not slant, sew a seam that runs from the hem (narrower end) to 7” short of the waist. Fold and press open the seam, including the part that was not sewn. Fold and iron ½ inch of fabric along the slit. Fold and iron a second time. Stitch around the slit to create a finished edge.
Measure the wearer’s waist with underskirt and hoop skirt on. Subtract 2” from this measurement and then halve it. Each panel of the skirt should be slightly longer than this measurement after pleating.

Measure in 4" to 6" at the top of the skirt on the angled sides. This portion of the skirt is to remain flat and marks where the pleating will begin.

Pleat the skirt, moving from the front of each panel towards the slit at the back. Pin the pleats twice, at the top and again about 2” lower, to prevent them from slipping during sewing. The best effect will be obtained if the pleats measure consistently on the front and consistently on the back. Pleats should be 1” or smaller. When deciding on the pleat size, consider the resulting fabric thickness and how your machine will react to it.
Cut a strip of fabric from the excess length at hem of the skirt that is as long as the waist measurement plus 3”. The strip should be 5” wide for a 2” waistband, 7” for a 3” waistband. Lighter materials work better with smaller waistbands. Zigzag stitch all raw edges.
One end of the waistband will extend slightly beyond the edge of the skit’s slit for the
Velcro. Start at the end of the waistband that will be flush with the slit. Allowing ½” for
the end seam. Lay the waistband, right side to right side, along the pleated edge of the skirt.
Pin the first panel towards the angled edge, being careful not to disturb the pleats. Leave a 2” gap between the angled edges of the 2 panels. Continue pinning the second panel toward the slit.
Sew the seam between the waistband and skirt and then press open. Turn a ½ “ edge at long edge of the waistband and press it flat. Fold the waistband in half and pin so the skirt edge is encased on both

Sides. Sewing this side of the waistband on may be easier to do by hand due to the thickness of the pleated skirt. Tuck in ½” at ends of the waistband and sew closed to create a finished edge.
Stitch a 6" piece of the soft side of the Velcro to the inside of the end of the waistband that is slightly longer than the skirt. The Velcro should be facing towards the wearer. Stitch a 1½" piece of the hook side of the Velcro to the flush end of the waistband. This Velcro should face away from the wearer. All Velcro should be attached so that it is not visible when the skirt is being worn.
The overskirt should be hemmed while wearing a hoop skirt and underskirt. Turn the edge under at the desired length and pin. It is acceptable to have the back of the skirt trail a bit on the ground if this effect is desired. Cut off any excess material and zigzag stitch the raw end. Stitch the hem by hand.
